
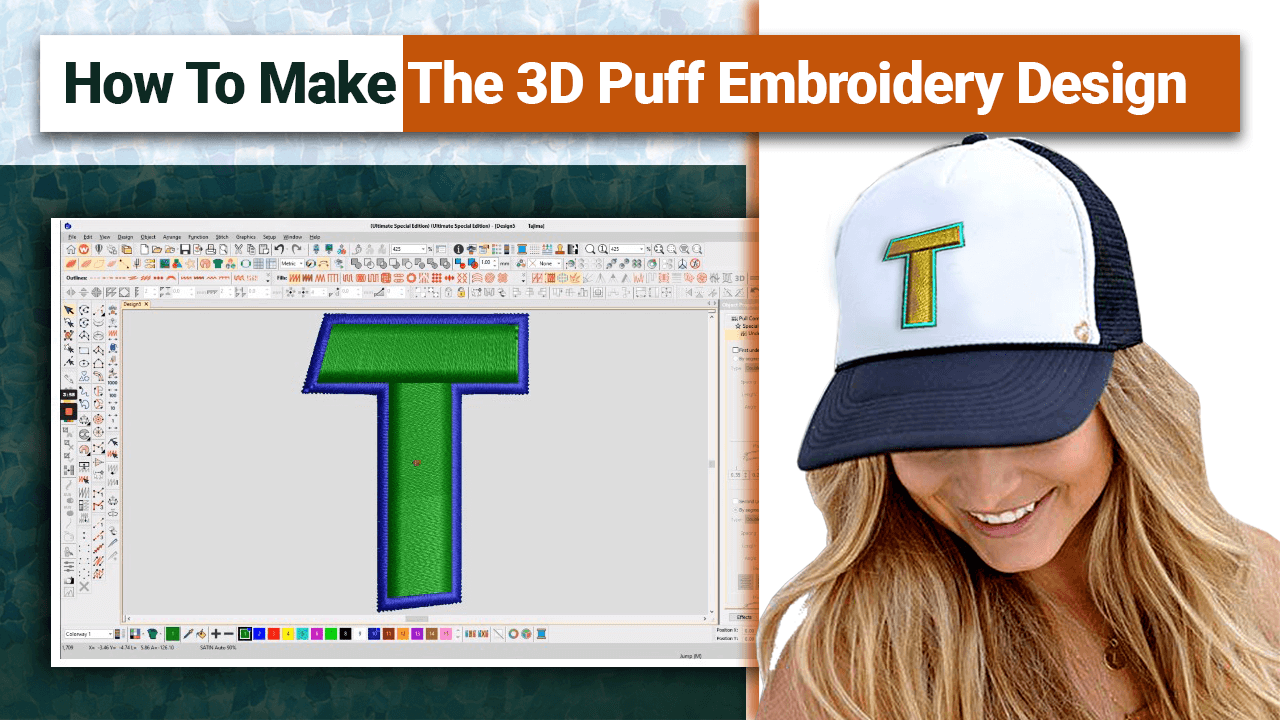
3D puff embroidery, also known as raised or foam embroidery, adds a unique and eye-catching dimension to embroidered designs. This technique involves using a foam underlay to create a raised, three-dimensional effect on specific areas of the design. While 3D puff embroidery may seem complex, with the right tools, materials, and techniques, you can achieve stunning results with ease. In this comprehensive guide, we'll walk you through the step-by-step process of making a 3D puff embroidery design, from digitizing your design to stitching it out on your embroidery machine.
Step 1: Digitize Your Design
The first step in creating a 3D puff embroidery design is digitizing your artwork or logo using embroidery digitizing software. Here's how to do it:
- Open your design file in the digitizing embroidery software of your choice.
- Select the areas of the design where you want to add the 3D puff effect.
- Create a separate digitized file for the foam underlay by duplicating the selected areas and converting them into a satin stitch or fill stitch with a slight overlap.
- Adjust the stitch settings to accommodate the thickness of the foam, typically between 3mm and 5mm.
- Save your digitized files in the appropriate embroidery file format (e.g., DST, EXP, PES) for stitching.
Step 2: Prepare Your Materials
Once you have digitized your design, it's time to gather the materials you'll need for the embroidery process:
- Foam Underlay: Choose a foam underlay specifically designed for 3D puff embroidery. The foam should be compatible with your embroidery machine and easy to tear or trim after stitching.
- Embroidery Thread: Select high-quality embroidery thread in the colors of your choice to stitch out the design. Polyester or rayon thread works well for most embroidery projects.
- Fabric: Use a stable, medium-weight fabric for your embroidery project, such as cotton twill or denim. Avoid lightweight or stretchy fabrics, as they may not support the 3D puff effect effectively.
- Embroidery Hoop: Secure the fabric in an appropriately sized embroidery hoop to keep it taut and stable during stitching.
- Embroidery Machine: Ensure that your embroidery machine is properly set up and in good working condition before beginning the embroidery process.
Step 3: Stitch Out the Foam Underlay
Before stitching the main design, you'll need to stitch out the foam underlay to create the raised effect. Here's how to do it:
- Load the foam underlay file onto your embroidery machine and secure the foam onto the fabric using temporary adhesive spray or pins.
- Stitch out the foam underlay using the appropriate stitch settings and thread color. Be sure to leave space between the foam stitches to allow for expansion when the foam is added.
- Once the foam underlay is stitched out, remove the fabric from the embroidery hoop and carefully trim away any excess foam around the edges of the stitched areas.
Step 4: Stitch the Main Design
With the foam underlay in place, it's time to stitch out the main design on top. Here's how to do it:
- Load the digitized main design file onto your embroidery machine and secure the fabric back into the embroidery hoop.
- Stitch out the main design, ensuring that the needle penetrates through the foam underlay to create the raised effect.
- Use a slightly longer stitch length than usual to accommodate the thickness of the foam.
- Monitor the stitching process closely to ensure that the needle does not snag or catch on the foam.
- Once the main design is stitched out, carefully remove the fabric from the embroidery hoop and trim any loose threads.
Step 5: Finish and Inspect the Embroidery
After stitching out the main design, it's important to finish and inspect the embroidery to ensure quality and durability. Here's what to do:
- Trim any excess thread or foam around the edges of the stitched areas using sharp embroidery scissors.
- Gently steam or press the embroidered fabric from the wrong side to flatten any puckering or distortion caused by the stitching process.
- Inspect the embroidery for any missed stitches, thread breaks, or other imperfections, and make any necessary adjustments or repairs as needed.
- Once satisfied with the embroidery, carefully remove any remaining stabilizer from the back of the fabric, taking care not to damage the stitches.
Step 6: Optional Finishing Touches
Depending on your preferences and the requirements of your embroidery project, you may choose to add optional finishing touches to enhance the appearance and durability of the design. Here are a few ideas:
- Add a layer of heat-seal backing to the back of the embroidered fabric to provide additional stability and prevent fraying.
- Apply a fabric adhesive to the back of the embroidered fabric and adhere it to a garment or accessory for a permanent bond.
- Use fabric glue or fusible webbing to attach small embellishments or appliques to the embroidered design for added visual interest.
Conclusion
Creating a 3D puff embroidery design adds depth, texture, and visual impact to your stitched creations. By following this step-by-step guide and using the right tools, materials, and techniques, you can achieve stunning results with ease. Whether you're embellishing caps, jackets, or other textiles, 3D puff embroidery offers endless possibilities for creative expression and customization. Experiment with different foam thicknesses, thread colors, and design elements to create unique and eye-catching embroidered designs that stand out from the crowd.
Embark on your 3D puff embroidery journey today, and bring your creative visions to life with this versatile and captivating technique.
Zdigitizing
We trust this article might really work out for you. To digitize embroiery plan you would require an expert like ZDigitizing, as digitizing is a mind boggling process.
Zdigitizing is a digitizing embroidery service organization that gives embroidery digitizing service and Vector Art Services all around the world to organizations, ventures, and enterprises. zdigitizing gives fashionable, strong, and sensible custom digitizing and vector craftsmanship administrations. We have been conveying first class digitizing embroidery administrations for 20+ years.
Good News: If you are looking service for convert image to embroidery file, Then ZDigitizing is best choice for you. Zdigitizing is a professional company that provides complete digitizing and vector art services worldwide.